iOSでパスキーの実装を理解するためにサーバーをNode.jsで代用することにしたのでその時の導入手順をまとめます。
目次
Node.jsとは
Node.jsとはサーバーサイドでJavaScriptを動かせる環境です。サーバー機能のライブラリ(httpモジュールなど)を持っていて、インストールするだけでJavaScriptでWebサーバーを書いて動かすことができます。
Node.jsをMacにインストールすることでnpm(Node Package Manager)も一緒に利用することができます。npmはライブラリ管理システムでnpmコマンドを利用して豊富なライブラリを手軽に導入することができます。
インストール手順
Node.jsは公式ホームページからインストールすることができます。
インストールした後は下記コマンドを叩いてみてください。
node -v
npm -vバージョンが表示されていればNode.jsもnpmをインストールできています!
プロジェクトの作成
続いてプロジェクトを作成していきます。
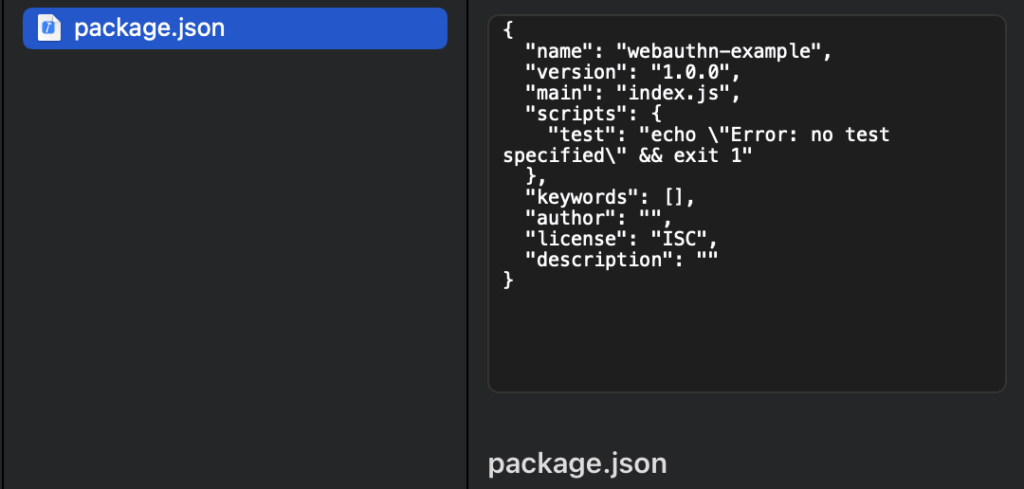
mkdir webauthn-example
cd webauthn-example
npm init -yパスキー利用の目的で作成するのでwebauthn-exapmleという名前にしています。npmをinitするとpackage.jsonというファイルが追加されます。このファイルはNode.jsプロジェクトの設定と依存関係を設定するファイルとなります。
必要なライブラリをインストールする
先ほど作ったプロジェクトでExpressとFIDO2(WebAuthn)のサーバー側処理を簡単にするためのライブラリである@simplewebauthn/serverをインストールします。
npm install express @simplewebauthn/serverインストールできるとnode_modulesディレクトリが作成されます。
サーバーファイル作成
プロジェクトディレクトリ内にserver.jsを作成しまた必要なAPIエンドポイントを定義します。
// requireでExpressモジュールを読み込む(importと同じ)
const express = require('express');
const simpleWebAuthn = require('@simplewebauthn/server');

// ユーザー登録(クレデンシャル作成)時にブラウザに返すオプションを生成
const generateRegistrationOptions = simpleWebAuthn.generateRegistrationOptions;
// 登録時の署名や証明書の検証
const verifyRegistrationResponse = simpleWebAuthn.verifyRegistrationResponse;
// 認証(ログイン)時にブラウザに返すオプションを生成
const generateAuthenticationOptions = simpleWebAuthn.generateAuthenticationOptions;
// 認証時の署名検証
const verifyAuthenticationResponse = simpleWebAuthn.verifyAuthenticationResponse;

// Expressのインスタンスを生成(ルーティング処理やリクエストごとの処理を定義できる)
const app = express();
// JSON形式のリクエストボディを自動で解析する
app.use(express.json());

// 登録したユーザーの情報を簡易的に保存するためのオブジェクト
let users = {};
// サーバー側で生成したランダムなチャレンジをユーザーごとに保持するオブジェクト
let challenges = {};

// パスキー登録用のページを表示する
app.get('/', (req, res) => {
  res.sendFile(__dirname + '/index.html');
});

// 登録開始
app.post('/register/start', (req, res) => {
  // ユーザーネーム
  const username = req.body.username;
  // WebAuthnの仕様でチャレンジを生成
  const challenge = Buffer.from(Math.random().toString()).toString('base64url');
  // 一時的にユーザー用のチャレンジとして保存
  challenges[username] = challenge;

  // @simplewebauthn/serverのメソッド
  // ブラウザがnavigator.credentials.create()を呼び出すために必要なPublicKeyCredentialCreationOptionsを生成する
  generateAuthenticationOptions
  const options = generateRegistrationOptions({
    rpName: 'Demo Site',
    rpID: 'localhost',
    userID: username,
    userName: username,
    challenge
  });

  // レスポンスにPublicKeyCredentialCreationOptionsをJSONとして返却
  res.json(options);
});

// 登録完了
app.post('/register/finish', (req, res) => {
  const { username, attestation } = req.body;
  // 簡易的に公開鍵だけ保存(実運用では verifyRegistrationResponse 必須)
  users[username] = attestation;
  res.json({ status: 'ok' });
});

// 認証開始
app.post('/login/start', (req, res) => {
  const username = req.body.username;
  const challenge = Buffer.from(Math.random().toString()).toString('base64url');
  challenges[username] = challenge;

  const options = generateAuthenticationOptions({
    allowCredentials: users[username] ? [{ id: users[username].id, type: 'public-key' }] : [],
    userVerification: 'preferred',
    challenge
  });

  res.json(options);
});

// 認証完了
app.post('/login/finish', (req, res) => {
  res.json({ status: 'ok' });
});

app.listen(3000, () => console.log('Server running at http://localhost:3000'));
サーバーを起動する
下記をコマンドを実行してサーバーを起動します。
node server.js

Server running at http://localhost:3000 // 起動中になりますSafariでアクセスしてページが出てくれば成功です。
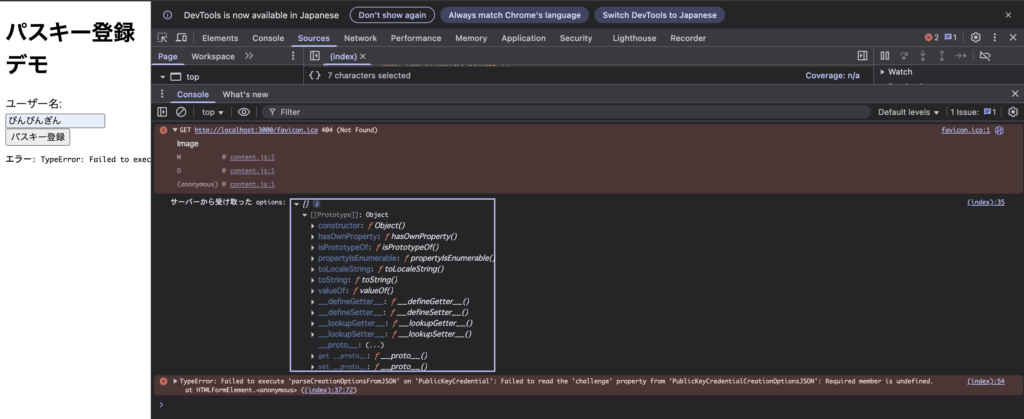
ログの出力
ブラウザ側のログ出力を行いたい場合はconsole.logを利用すれば検証ページから確認することが可能です。